How to create and test Unreal Engine patches on Eagle 3D Streaming
Ship Unreal Engine updates as .pak patches, not full rebuilds. Set up launch profiles, test locally and upload patches to Eagle 3D Streaming.
 Eagle 3d Streaming
September 24, 2026
7 min read
You fixed one Blueprint. Now you have to repackage the whole project, zip it and upload it again. For a big Unreal app, that's a slow loop for a small change.
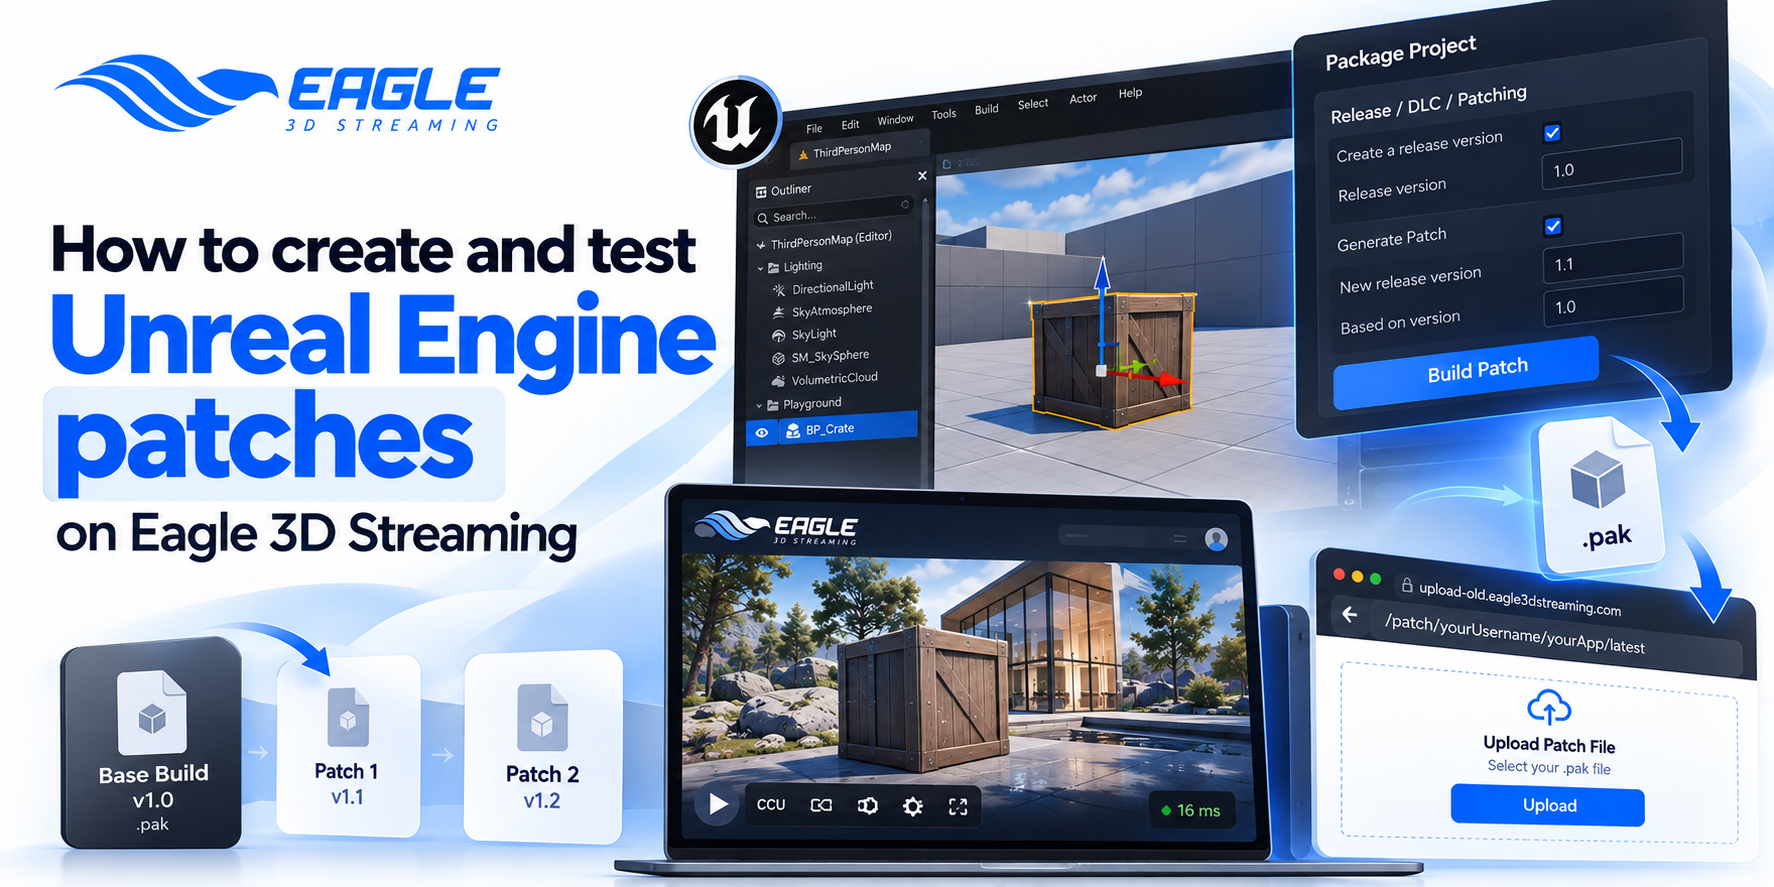
Patches cut that loop down. You upload the full build once, then send only the changed content as a .pak patch file. This guide walks through Eagle 3D Streaming's patch workflow, from a demo run to your own patches.
How patching works on Eagle 3D Streaming
A patched app has two parts. The base game holds everything, and each patch holds only what changed since. Unreal loads the base .pak first, then the patches on top of it.
Eagle 3D Streaming's guide splits the process into three parts. First you try a pre-made patch on a demo app. Then you set up launch profiles and build your own patch. This post follows the same order, since the demo proves the pipeline before you touch your own project.
Step 1: test the workflow with the Eagle 3D Streaming demo app
Start with Eagle 3D Streaming's packaged demo project, not your own build. Download the demo, then upload the zip to the Eagle 3D Streaming Control Panel. Play it once so you know what the unpatched version looks like.
Next, build the patch upload URL. It follows this pattern:
https://upload-old.eagle3dstreaming.com/patch/{userName}/{appName}/latest
{userName} is your Control Panel username. {appName} is the name you gave the app when you uploaded it. A user called demo with an app called patchDemo would use https://upload-old.eagle3dstreaming.com/patch/demo/patchDemo/latest.
Open that URL and choose the .pak file from the demo zip. Upload it, then play the app again. The patch changes should now show up in the stream.
Step 2: set up a base packaged profile
Your own project needs custom launch profiles in Unreal's Project Launcher. One profile builds the base game, and a second builds patches. The standard Package Project menu won't do this.
Open Project Launcher and add a custom launch profile. Use these settings for the base build:
- Cook Mode: By The Book
- Platform: Windows
- Culture: en
- Maps: your working map
- Release/DLC/Patching: enable "Create a release version of the game for distribution", release version 1.0
- Advanced: Iterative Cooking, Compress Content, and Store all content in a single file (unrealPak)
- Package: Package & store locally, with Retain the staged directory checked
- Deploy: Do not deploy
The release version matters most here. Every later patch points back to it, so write it down. If your base build fails to package, check these UE5 packaging mistakes first.
Step 3: set up a patch packaged profile
Add a second custom launch profile. Most settings match the base profile, with a few changes under Release/DLC/Patching:
- New release version: 1.1
- Release version this is based on: 1.0
- Generate Patch: checked
Under Advanced, keep Compress Content and Store all content in a single file checked. Package and Deploy stay the same as the base profile.
Step 4: modify the project and build your patch
Now make a change you'll be able to spot. Eagle 3D Streaming's walkthrough uses a patch-prepared project for this, but your own works too. Add an object to the level or edit a Blueprint, then save everything.
Open Project Launcher from Platforms > Project Launcher. Select your patch profile and click Launch. The new .pak file lands in Saved\StagedBuilds\Windows\[ProjectName]\Content\Paks.
Step 5: test the patch locally first
Don't upload a patch you haven't run. Copy the new .pak into the Content\Paks folder of your base game. Launch the base game and check that your change appears.
This local test catches a bad profile before it reaches the cloud. You can also test the whole build with Epic's Signaling Server to check the stream side. Packaged builds can break in ways the editor hides. See why UE5 games run fine in PIE but die when packaged.
Step 6: upload the base game and patch to Eagle 3D Streaming
Upload your base game to the Control Panel as a normal app. Then open its patch URL, using your own username and app name. Upload the patch file and play the app online to confirm the change.
Order matters here. Upload the base game first, then patches one at a time. Skipping ahead or mixing up the sequence can leave the app in the wrong state. If the stream drops after a patch, see why your session stopped mid-stream.
Rules that keep patches from breaking your app
Never remove the base game .pak file. The app won't run without it, however many patches you upload on top.
Name patches carefully and keep them in sequence. Eagle 3D Streaming's examples follow a pattern like testPatch3-Windows_0_P.pak and then testPatch3-Windows_1_P.pak. Higher-numbered patches override lower ones, so a naming mistake changes what viewers see.
Keep your older patch files before you overwrite anything. Removing a patch rolls the app back to the previous version automatically. That's handy for undoing a bad release, but only if you still have the earlier files.
Patches vs full app updates on Eagle 3D Streaming
Patches aren't the only way to ship changes. You can also upload a new version of your app from the Control Panel. That route replaces the whole build, and the exe name must match the original app name.
Patches suit frequent, small content changes. Full uploads suit engine upgrades or big structural changes. For teams that ship often, Eagle 3D Streaming also has CI/CD app upload automation and an automation tool for uploads.
Conclusion
Patching changes how you ship updates. You set up two launch profiles once. After that, every change is a small .pak instead of a full rebuild. The base game stays in place, and each patch stacks on top in order.
Start with Eagle 3D Streaming's demo patch so you know the pipeline works. Then build your own, test it locally, and upload it in sequence. Keep every old patch file, because that's your rollback plan.
Ready to try it? Start your free 7-day trial with 1 CCU and upload the demo app today. Shipping updates for a large client project? Book a demo and plan your release process with the team. Stuck on a patch? Contact support or ask in the Discord community.
FAQs
What is a patch file in Unreal Engine?
A patch is a .pak file that holds only the content changed since your base release. Unreal loads it on top of the base game's .pak. You avoid rebuilding and re-uploading the whole app for each change.
Where do I upload a patch on Eagle 3D Streaming?
Use a patch URL built from your username and app name. The pattern is https://upload-old.eagle3dstreaming.com/patch/{userName}/{appName}/latest. Open it in a browser and choose your .pak file.
Can I patch an app without launch profiles?
No, you need two custom launch profiles in Project Launcher. One builds the base release, and the other generates patches based on it. The standard package menu doesn't create patch files.
Where does Unreal save the generated patch file?
It goes to Saved\StagedBuilds\Windows\[ProjectName]\Content\Paks. Copy it into your base game's Content\Paks folder to test locally. Upload it only after the change shows up correctly.
What happens if I remove a patch?
The app reverts to the previous version automatically. Removing the base game .pak is different, because the app won't run at all. Always keep older patch files so you can roll back.
Does the order of patch uploads matter?
Yes, the sequence matters. Upload the base game first, then patches one by one. Higher-numbered patches override lower ones, so follow the naming pattern exactly.
For every screenshot and setting, see Eagle 3D Streaming's full Patch Creation & Testing Guide. It also links the demo project and pre-made patch files.
Share this article